
Step 1
1. Choose in which editor you will create or edit your quiz.
2. It is recommended to use an XML editor. The links to the recommended ones are listed below. But you can also use a regular notepad.
3. Further, the guide will be carried out using the example of a free XML editor specified at the link below.
Step 2
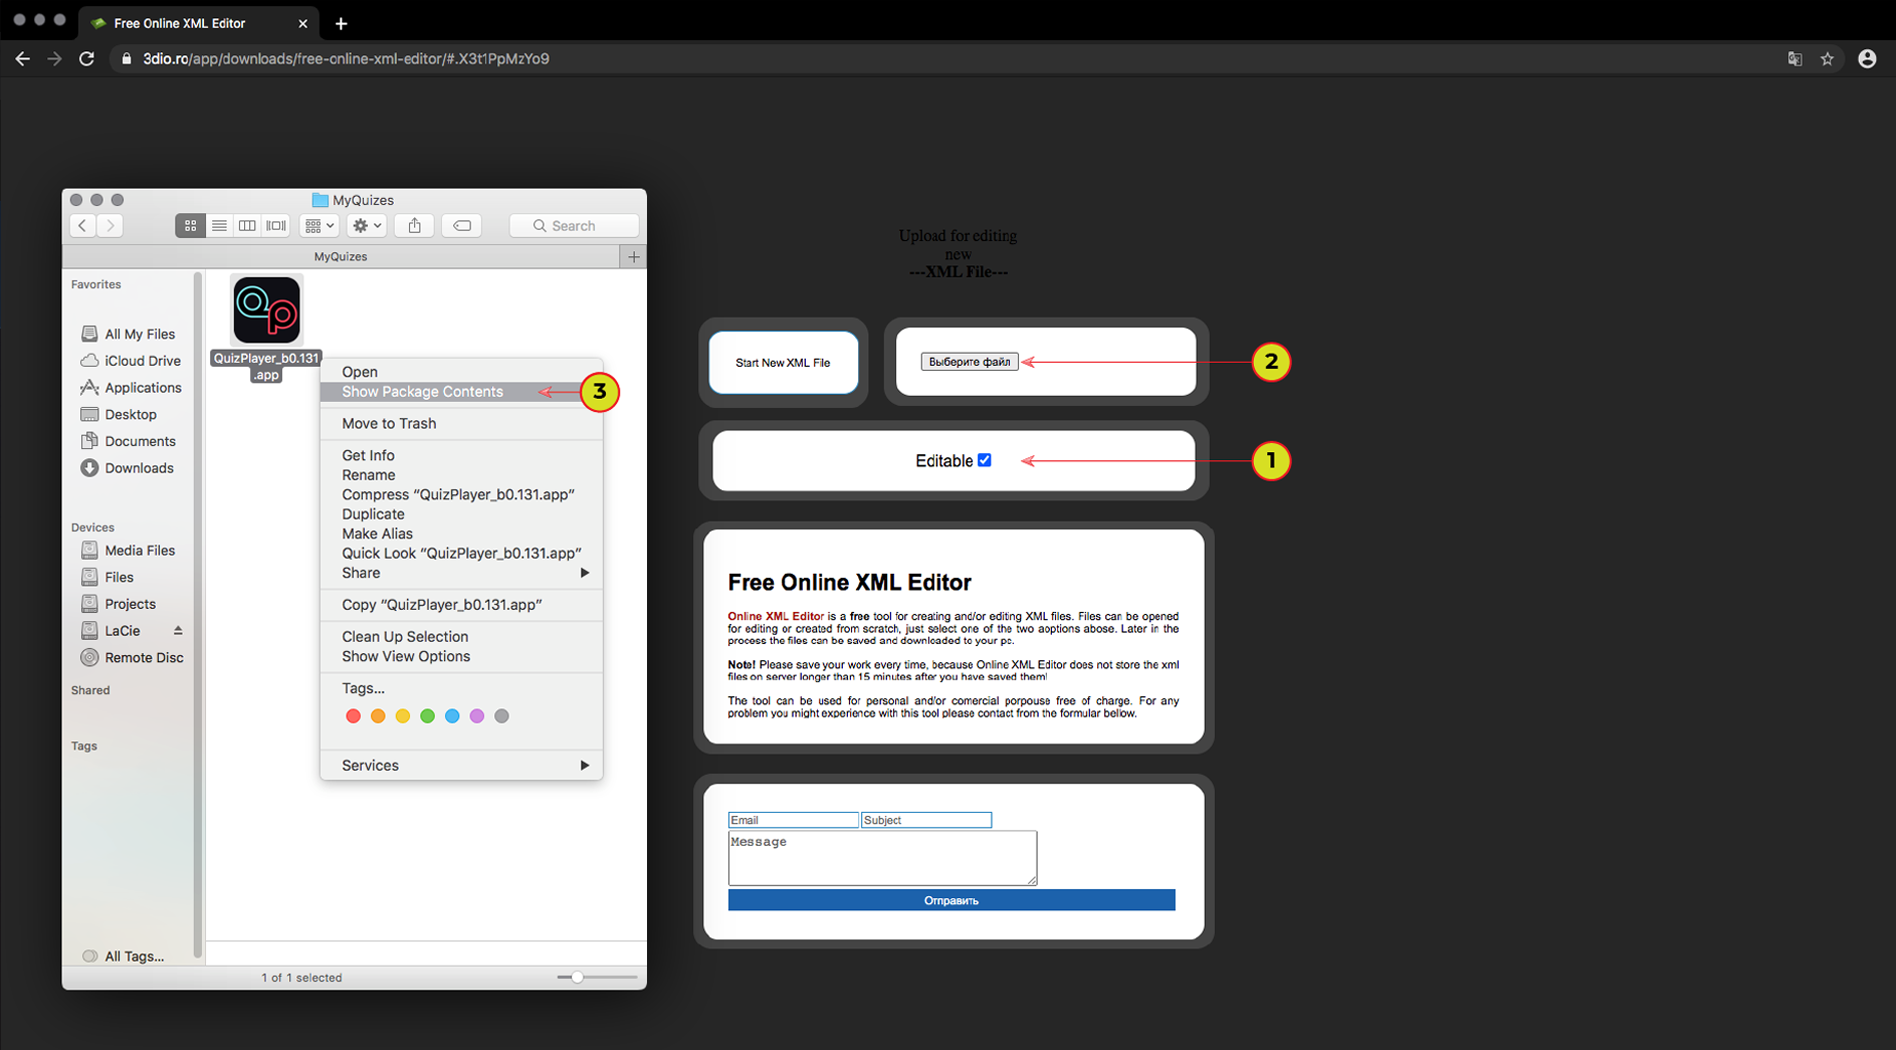
1. Check the flag is set to "Editable". If not, set it.
2. Select the XML file for editing.
It is located in the program folder and the name is "settings.xml".
It is located in the program folder and the name is "settings.xml".
3. MAC OS: Right click on the application and select “Show Package Contents”, next: Contents > Resources > Data > StreamingAssets > UserFiles
Windows: QuizPlayer_Data > StreamingAssets > UserFiles
Step 3
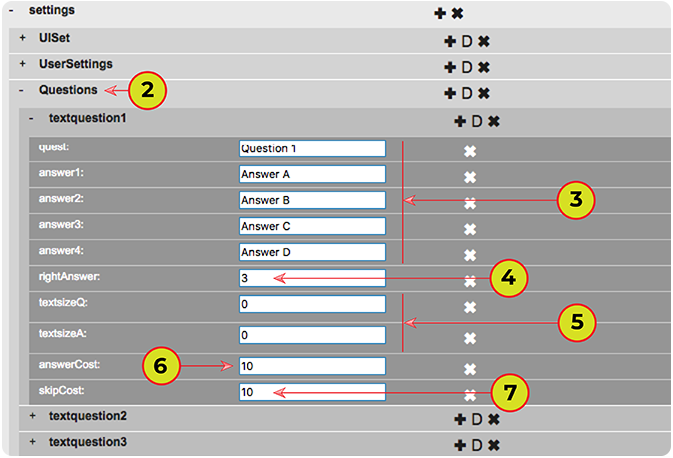
1. Open the tree called "Questions" to create or edit a question. You can see three questions in the source version of the XML file, you can edit or delete it.
2. Expand the tree with the first question.
3. Here you can enter your question and four answers..
4. Enter the number of the correct answer.
5. Enter the font size for the current question in the "textsizeQ" box and for answers in the "textsizeA" box. Enter "0" if the font size will be taken from the global setting.
6. Enter the quantity of points the player will receive for the correct answer.
7. Enter the quantity of points the player will spend for skipping a question.
Step 4
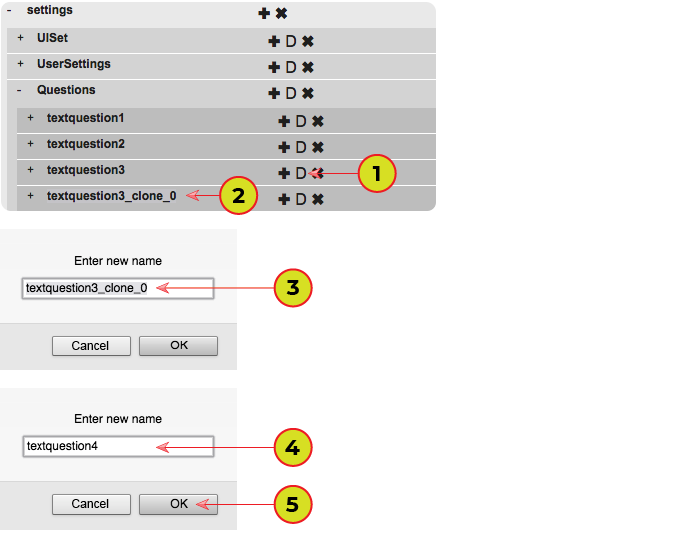
1. Copy one of the previously created questions.
2. Double click on the name of the copied question.
3-4. Enter the name of the new question. "textquestionX", X - it's the question number.
5. Click "OK".
6. Go back to step 3.
Step 5
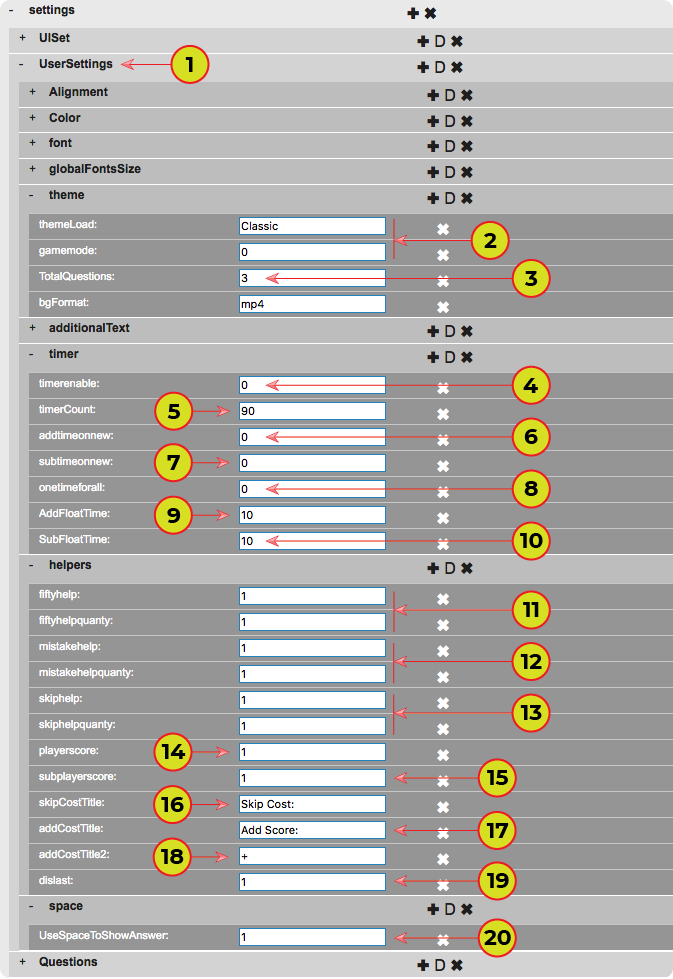
1. Set the rules for the quiz, open the tree called "User Settings". Rule settings are located in the sections: "theme", "timer", "helpers", "space".
2. Enter the name of the quiz template and the game mode: "0" = winwin (even after entering an incorrect answer the game continues); "1" = classic mode ( the game ends after wrong answer)
3. Enter the quantity of created questions.
4. Turn on the timer = "1", Turn off the timer = "0".
5. Enter time in seconds.
6-7. Add and subtract time in case of correct or incorrect answers. "0"=No, "1"=Yes. (Doesn't work in multiplayer)
8. One timer for all questions. "0"=No, "1"=Yes.
9-10. Set the quantity of seconds that will be added or subtracted from the total time in case of correct or incorrect answer.
11-13. Enable hints "50х50", "Extra Life" and "Skip Question" "0"=No, "1"=Yes. Set the quantity of times to use.
14. Show player score. "0"=No, "1"=Yes.
15. Subtract the player's points in case of an incorrect answer. "0"=No, "1"=Yes.
16. Skip question. Text label.
17-18. Add player points. Text label.
19. Disable hints on the last question.
20. Display answers only on pressing the spacebar. "0"=No, "1"=Yes.

Step 6
1. Customize the design of your quiz, open the tree called "UserSettings". Design settings are in the sections: "Alignment", "Color", "font", "globalFontSize", "additionalText".
2. Magnet template for answers. A value from "0" to "3".
3. The alignment of responses relative to the line. The values: "Left", "Center", "Right"
4. Question and Answer Text Color, statistics test color, glow color of wrong answer, glow color of the correct answer, glow color of choice.
5. The font size of the "end of time" text label.
6. The font name. Name is case sensitive. ATTENTION!!! The name of some fonts may differ from the name installed on the system. You can use Font Selector to detect the system fonts names.
8. Section of game statistics.
9. The text of the labels at the end of the game."Congratulations", "End time", "Quantity of questions", "Quantity of wrong answers", "quantity of correct answers", "The game score", "Time spent", "Rating".
10. Font size for inscription "Congratulations". Font size for the rest of the labels in this section.
11. Turn statistics items on or off. Display the quantity of correct and incorrect answers, time spent display, display rating. "0"=No, "1"=Yes.
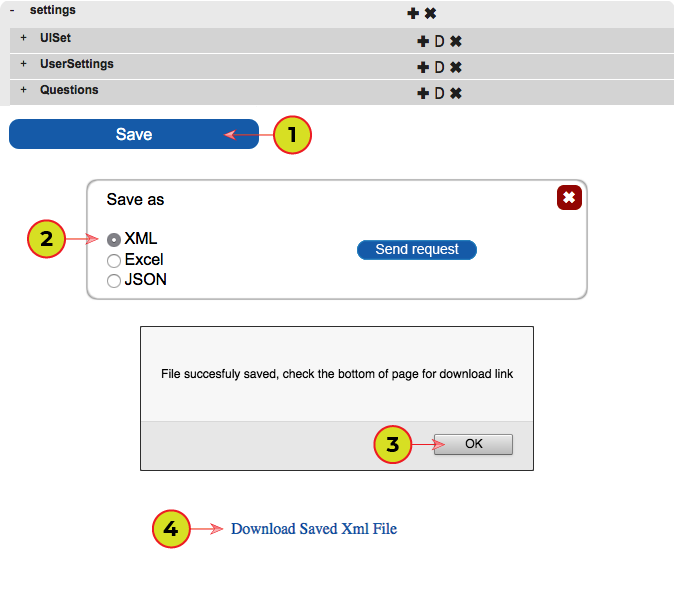
Step 7
1. Press on "Save".
2. Please select "XML" and press "Send request".
3. Press on "OK"
4. Download the file by clicking on "Download Saved Xml File"
5. Rename the downloaded file to "settings.xml" and put it in the program folder.
MAC OS: Right click on the application and select “Show Package Contents”, next: Contents > Resources > Data > StreamingAssets > UserFiles
Windows: QuizPlayer_Data > StreamingAssets > UserFiles